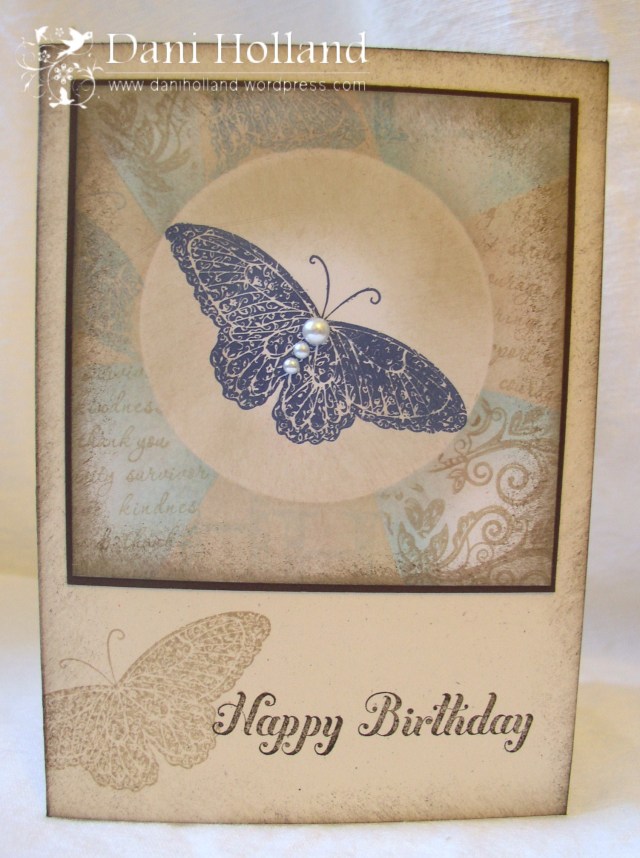
Magical Birthday Wishes…

No, I haven’t dropped off the planet! Since I last posted, we’ve been to Canberra and back, Claire Bear has joined Brownies, and participated in her very first campfire singalong (I still have Ging Gang Goolie stuck in my head), Bella Boo has turned 4 and had a very exciting Octonauts party in the park, and I’ve been getting organised for my Christmas Stamp a Stack day on Saturday 5th November. Right now, I should be in the kitchen baking 100 chocolate muffins for the Halloween canteen at Claire Bear’s school on Friday! And, along with all these other things, my niece Hannah celebrated a very Happy Hogwarts Birthday, and turned 10.

I wish I could have attended her party! Because my sister and brother-in-law work in the hospitality industry, they had access to a huge screen to show the first Harry Potter movie on, complete with a cart of treats with Honeydukes inspired lollies, and a long Hogwarts inspired banquet table for the birthday feast.

I did help with a bit of decorating while we where there in Canberra – drawing the Hogwarts school crest on a huge piece of card, and helping ‘stamp’ the brick wall onto paper (with a car washing sponge!) so that the guests could ‘magically’ go through Platform 9 3/4 to the party area. I’m waiting to see some photos from the party, and I’ve told my sister to hang on to all the props, just in case Claire Bear or Bella Boo become Harry Potter fans like their obsessed mother 😉

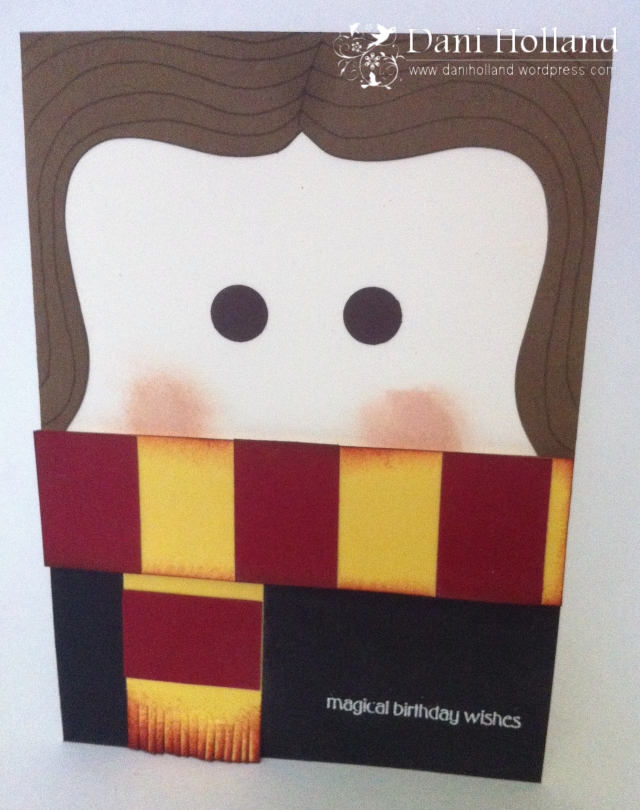
Hannah loves Hermione and was getting dressed up as her for the party, so we bought her a hand-carved ivy wooden wand (with ‘essence of dragon heartstring’)  from Alivans in the USA, and a copy of ‘Fantastic Beasts and Where to Find Them’ for her birthday – essential items that Hermione wouldn’t be seen without! She was given those gifts while we were visiting Canberra so they would be ready for the party, but I did send her a card in the post last week (not Owl Post unfortunately) that she could open on her actual birthday.

  • Stamp Set: Pony Party
  • Ink: Cherry Cobbler, Soft Suede, Blush Blossom, Versamark
  • Cardstock: Cherry Cobbler, Daffodil Delight, Whisper White, Soft Suede, Early Espresso
  • Big Shot: Top Note Die
  • Accessories: XL Two Step Owl Punch, Embossing Buddy, White Embossing Powder, Heat Tool, Sponge Dauber, Tombow Glue

Sorry about the quality of this photo – I just remembered to take a quick pic with my Iphone before I popped it into the envelope! This Hermione Card has been cased from a US Demonstrator who used My Digital Studio to create them – you can see them here on her blog Creative Aubservations. My Hermione card is pretty much the same – I’ve used the same elements I think – the Top Note die for her hair outline, and the largest circle from the owl punch for her eyes. I’ve made some slight modifications, by sponging in her cheeks using a sponge dauber and my Blush Blossom marker, drawing in her hairline with a Soft Suede marker, and adding some sponging here and there to provide definition. I thought the sentiment from Pony Party was perfect for a Harry Potter card!

I’ve finally got new batteries for my camera, so you’ll be getting posts on a more regular basis this week. I’m lining up a whole heap of Christmas inspired projects to share with you, so we can do a countdown to Christmas!

I’ve still got a few places left at my Christmas Stamp a Stack – here are the details, in case you’ve missed them! You can email me at inkypinkystamps@gmail.com to book your spot – I will need to know by 1st November at the latest so I can have all the cardstock pre-cut and decide on what Christmassy treats to bake!


At my Christmas Stamp-a-Stack, you’ll make 12 cards, 6 each in two different designs, and a set of 12 gift tags. All you need is provided – pre-cut cardstock, all materials and embellishments, adhesive and envelopes for the cards, along with a cuppa and Christmas themed light refreshments, to get us in a Christmassy mood.

The class will be set up so you can construct the cards in an assembly-line format, with full instructions and a list of materials to create more later if you wish.

You can choose to come to either the morning session – 10am to 12 noon, or the afternoon – 2pm to 4pm. Please let me know which session you prefer when you make your booking.

The cost of each session is $25 and places are limited to ensure individual attention. Warning – Christmas Carols will be playing, so if you don’t like ’em, bring your ear plugs!


Thanks for taking a peek today!

Cheers,
Retiform – what on earth is that?

That’s what I said the first time I heard of this technique, but it’s one of my favourites. A little involved, but you can get such a beautiful finish on your cards. It’s a little like making a patchwork quilt with stamps and ink, and if you’re a ‘shabby chic’ kinda gal like I am, too much is never enough!

We made this card in my Retiform Technique class last night, and it’s going straight into my ‘birthday box’ of cards for family birthdays. I’m really pleased with the way it turned out. I hope you like it too.

  • Stamp Sets: Strength & Hope, Bring on the Cake (both sets available in the Autumn-Winter Mini until 31 July)
  • Inks: Crumb Cake, Early Espresso, Baja Breeze, Night of Navy
  • Cardstock: Early Espresso, Glossy White, Naturals Ivory
  • Big Shot: Circles No.2 Die
  • Accessories: Basic Pearls
  • Non-SU!: Post-it Notes

Retiform seems to work best if you have a few coordinating stamps (which SU! Stamp Sets are perfect for!), one of which you make a focal point of your card. It’s a process of masking, sponging and stamping which gradually builds up your ‘quilt’. It’s not tricky, but it is time consuming, so probably best reserved for those special cards and scrapbooking pages.

I learnt this technique by watching Beate (pronounced Bee-art-ah) from Splitcoast Stampers make this amazing Christmas Card on YouTube. This one is a very involved card, but Retiform can be as simple as sponging a square or pentagon around your focal image and then stamping coordinating stamped images in each section.

I won’t be holding another Retiform Technique Class in Summer Hill until after the July School Holidays, but if you’d love to see how it’s done close up, why not book a special class at your home? I need at least two attendees – call or email me to see when I’m available.

I could also demonstrate a simple version of this card at a Workshop. If you have been toying with the idea of scheduling a workshop soon, I’ve got some news for you. Stampin’ Up! have just announced a special deal – the Extra! Extra! Hostess Promotion!

Hold a $450 workshop (including GST and shipping) between 23 May and 30 June 2011, and earn an EXTRA $70 in hostess rewards! This is in addition to our regular hostess benefits.

Pretty good deal huh! If you’d like to find out more, click on my ‘Book a Workshop With Me‘ icon on the right hand side of this page – it’s all about getting crafty and having a fun afternoon or evening with friends.

And while you’re here, today is Wednesday, so don’t forget to click on the ‘Deals of the Week’ banner to find out this weeks new bargains.

Thanks for taking a peek today.

Cheers,

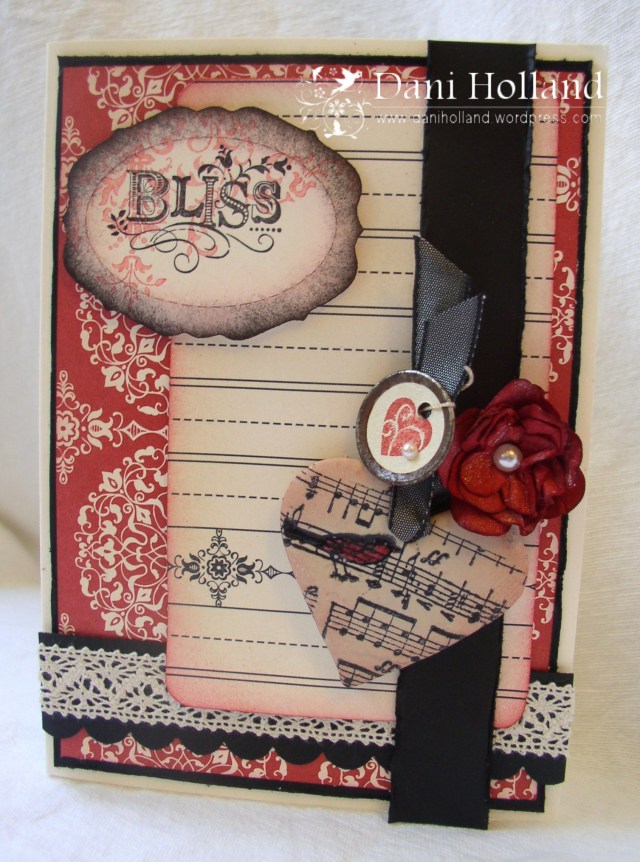
Blissful Love

Yesterday I held my UNconventional Sunday. The five of us had a lovely time, doing our own thing, and some gorgeous cards were made. Did I think to take photos of any of them while everyone was there? Nope, only thought of it this morning. D’oh!

I can share with you one card that I made, which was inspired by the current CASE Study challenge. Here’s a look at Sarah Martina Parker’s beautiful card.

I loved the colour combo on this card, but decided to follow the layout instead. I loved the pearls, lace and ribbon, and the cameo that Sarah has used. And as mine is a wedding card, I’ve pulled out all the stops – I think I may have to make a box to send it in, as it’s sure not going to fit in an ordinary envelope – the post office will love me!

  • Stamp Sets: Bliss (SAB Set), Musical Notes Wheel, Tiny Tags
  • Ink: Riding Hood Red, StazOn Black
  • CS: Very Vanilla, Basic Black, Riding Hood Red
  • DSP: Love Letter
  • Big Shot: Lots of Tags Sizzlit, Floral Fusion Sizzlit
  • Accessories: Basic Pearls, Silver Brad, Scallop Edge Punch, Corner Rounder Punch, Mini Vintage Tags, Victoria Crochet Trim, Black Satin Ribbon, Stampin’ Dimensionals, Frost White Shimmer Paint (mixed with rubbing alcohol to make Shimmer Spray)
  • Non SU!: Fimo, heart shaped biscuit cutter, bamboo skewer

I’ve shown you my Fimo creations before. The rose is easily made using the Floral Fusion Sizzlit – cut out two of each size, then spray them with the Shimmer Spray and let them dry slightly. Then scrunch them up good and tight, then unscrunch and layer, biggest to smallest on your Mat Pack foam pad. Stab them with your Paper Piercing Tool, and then insert a brad through the hole and arrange your petals until you’re happy with them. Stick on a Basic Pearl to hide your brad, and you’re done.

It may not look like Riding Hood Red ink on the Bliss framed sentiment, but that’s because I stamped off my ink twice before stamping in the background – I didn’t want the red competing with the black too much.

I hope the happy couple enjoy this card – I better make sure I remember to post it!

Thanks for taking a peek today.

Cheers,

Happy Birthday Queen Shannon

Stampin’ Up! Convention is on today in Melbourne and I’m not there 😦

But, I couldn’t help not being involved somehow! A little bird called Teneale told me it’s Shannon West’s birthday today. Shannon is one of the Stampin’ Up! Demonstrator Trainers from the US, and because she’s over here on her birthday, and not at home with family and friends, a whole bunch of Aussie SU! demos decided it would be lovely for as many people as possible to make her a birthday card – let’s hope our shower of cards doesn’t put her luggage over the limit!

Here’s mine – it’s another of my Faux Linen cards – I really hope she likes it!

  • Stamp Sets: You’re a Gem, Bliss (SAB set), Musical Notes Wheel, Tiny Tags
  • Ink: StazOn Black, Crumbcake
  • CS: Whisper White, Basic Black, Glossy White
  • DSP: Greenhouse Gala
  • Accessories: Victoria Crochet Trim, Basic Pearls, Distressing Essentials Kit

I’m so sorry I’ll be missing her presentations – one of last years extolled the virtues of owning a Snuggie (she was using it to demonstrate marketing principles and meeting customers needs, but the examples she showed were hilarious!)

If you’d like to see her in action, here she is on YouTube demonstrating the Bliss stamp set – isn’t she cute?

I hope she has a wonderful birthday over here in Australia. If you’d like to learn how I achieved the effect on Shannon’s birthday card, I’ll be doing another Faux Linen class on Wednesday 22nd June – just send me an email letting me know you’d like to attend.

Thanks for taking a peek today.

Cheers,

Tea Rose

I love getting ready for my Technique classes. Sometimes it’s a technique that I’m really familiar with, and want to share, and other times it’s one I haven’t tried before, but have always wanted to have a go!

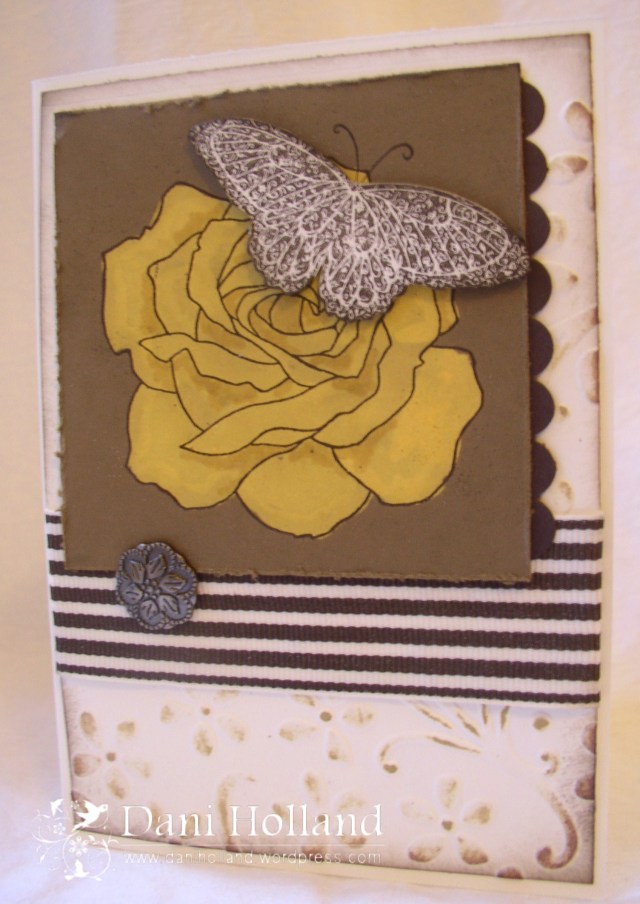
Last night I did a class on Bleached Out Images. I’ve always had trouble making stamping with bleach work for me (and it’s very smelly and gives me a headache), but stamping and embossing your image first, and then bleaching out the colour with a paintbrush is lots of fun, because you get to experiment and see what colour your image will turn out! And, if you put the bleach in your Aqua Painter, you don’t even have to smell it (much!).

Here’s last night’s card.

  • Stamp Sets: Fifth Avenue Floral, Strength & Hope (available until 31st July)
  • Ink: Early Espresso, So Saffron
  • CS: Very Vanilla, Early Espresso, Soft Suede
  • Big Shot: Elegant Bouquet Embossing Folder
  • Accessories: Early Espresso Striped Grosgrain Ribbon, Distressing Essentials Kit, Antique Brads, Scallop Edge Punch, Stampin’ Dimensionals, Clear Embossing Powder, Heat Tool

You might think by looking at that stamped rose from Fifth Avenue Floral that I’ve bleached it and then coloured it all in So Saffron, but that’s actually the colour of the base cardstock – the bleach removes any dye in the cardstock and takes it back to its original colour. I’ve just used a So Saffron marker to create a few shadows, which the bleach does anyway for you! By embossing the image with Clear Embossing Powder, the stamped outline is protected from the bleach, and remains dark.

We used the Tea Stain and Flat Stamp from the Distressing Essentials kit to highlight the detail created by the Elegant Bouquet Embossing Folder – not too much, but just enough to tie in the colours.

And I couldn’t help adding in that beautiful butterfly from the Strength & Hope set – it’s my latest purchase, and I was just itching to use it. To make life easier for myself, I stamped the image directly onto the rose first, and then stamped it again onto some Very Vanilla cardstock and popped it up on dimensionals after cutting around the main part of the butterfly – that way, I didn’t have to cut out those fiddly antennae. Sponging the edges with the same colour ink hides any inaccuracies with your scissor work 😉

If you’ve got any questions about this technique, don’t hesitate to drop me a line, or if you’re in the Inner West area of Sydney, why not come along to my next class demonstrating this technique on 29th June?

Thanks for taking a peek today.

Cheers,

Fit for a Queen

Hiedy Ho Happy Stampers!

Happy Mothers Day! If you’re a Mum, I hope you’re being spoilt today, and if you’re not, I hope you’re off spoiling your Mum!

I just wanted to share the other Mothers Day card that I made, for my Mum-in-Law.

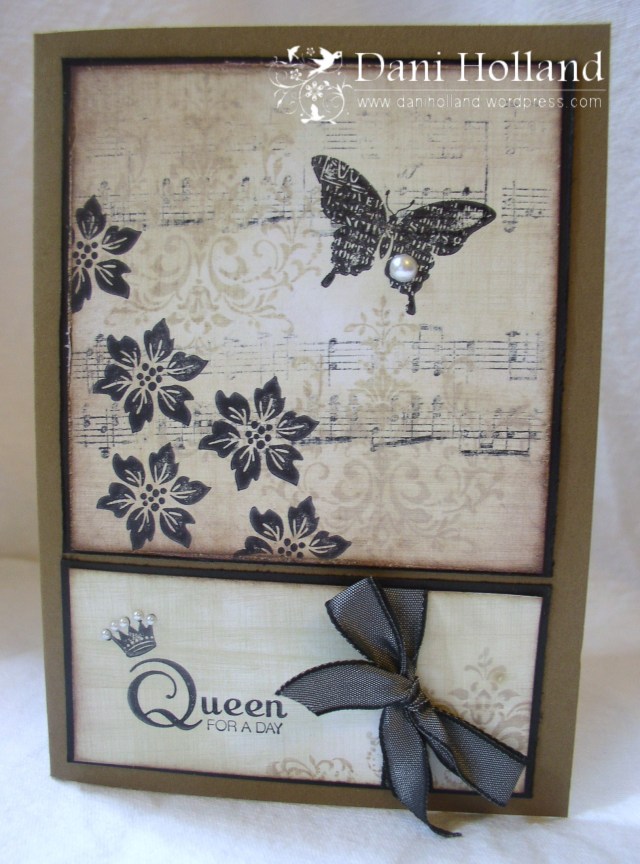
  • Stamp Sets: Musical Notes Wheel, You’re a Gem (available until 31st July), Bliss (SAB Set), Tiny Tags
  • Inks: StazOn Black, Crumb Cake
  • CS: Glossy White, Basic Black, Soft Suede, Early Espresso
  • Accessories: Basic Black Satin Ribbon, Distressing Essentials Kit, Basic Pearls

Its very similar to the card I made for my Mum, but I wanted to make Cheryl’s more ‘tone on tone’ because I know she likes that look. I’ve used a bit of Early Espresso to darken the edges of the cardstock after distressing and sanding.

Have a lovely Mothers Day everyone!

Thanks for taking a peek.

Cheers,

For My Mum

I’m pretty sure my Mum doesn’t read my blog – not because she wouldn’t like to, but because she’s too busy managing a motel in Canberra! So, I think I’m safe posting this card before Mothers Day.

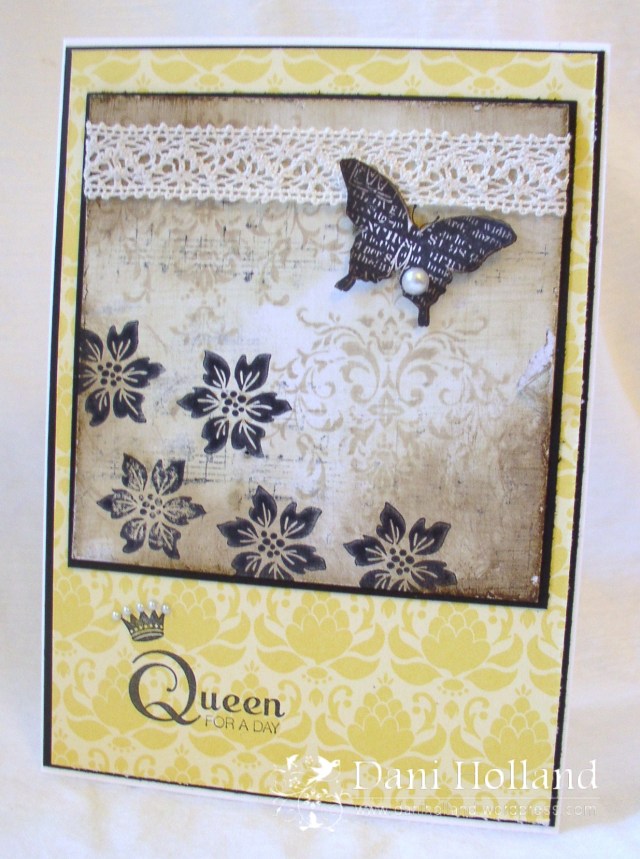
We did a card in my Technique Class on Tuesday using the Faux Linen technique (also known as Sanded Background). While I was working out a card for the class, I decided I loved the look so much, I created a card using the technique for both my Mum, and my Mum-in-Law (you’ll see hers later). I also love layering my stamped images one on top of the other, and the Faux Linen technique is perfect for doing this, as you lighten the images by sanding your background.

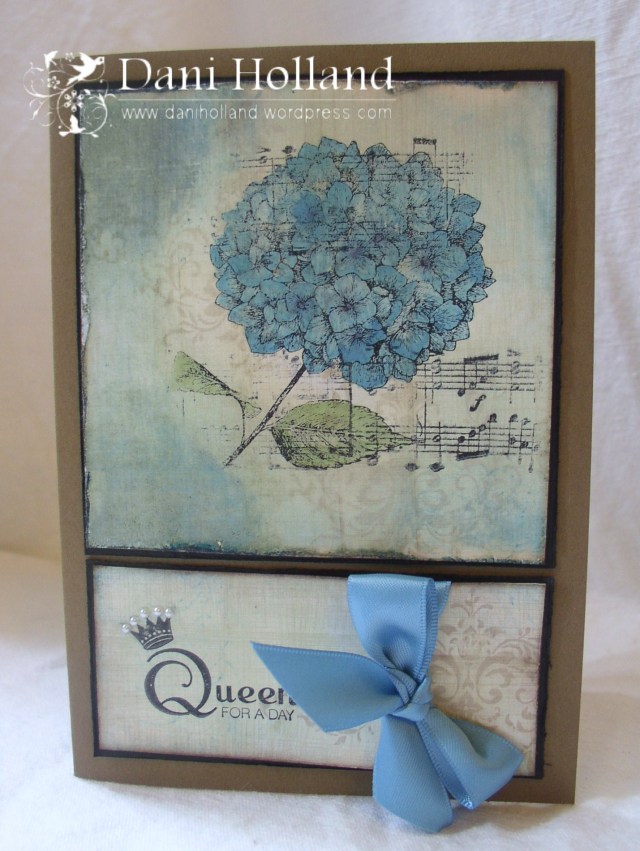
  • Stamp Sets: Musical Notes Wheel, You’re a Gem (available until 31st July), Bliss (SAB Set), Because I Care (Level 1 Hostess Set), Tiny Tags
  • Inks: StazOn Black, Crumb Cake, Marina Mist, Pear Pizzazz
  • CS: Glossy White, Basic Black, Soft Suede
  • Accessories: Marina Mist Satin Ribbon, Distressing Essentials Kit, Basic Pearls

I love using the Distressing Essentials Kit – I’ve used the sandpaper to groove the Glossy White cardstock, and the flat stamp and the Tea Stain and Navy distressing inks to get this look – if you look very closely you can see the marks the sandpaper has made – using distressing ink over the top makes them more visible. I wanted just a small amount of the Musical Notes wheel to be showing, so I stamped that first using the StazOn Black – that way most of the image has been sanded off, and it’s just faintly there. I coloured the beautiful hydrangea image from Because I Care last with my blender pen, to give it a softer look than using Stampin’ Write Pens.

I think I’ll be using that ‘Queen for a Day’ stamp from the You’re a Gem set a lot – it works so well with the little crown stamp from Tiny Tags, and the smallest Basic Pearls are a perfect fit for the jewels on the crown. The Marina Mist ribbon ties in the blue distressing and the colouring on the hydrangea. I’m really pleased with this card, and I hope my Mum likes it too.

If you’d like to learn this technique, my next Faux Linen class will be on Wednesday 22nd June – email me if you’d like to attend.

Thanks for taking a peek today.

Cheers,

Baby Wipes – is there anything they can’t do?!?

We love baby wipes in this house. Our babies might not be teeny tiny any more, but that doesn’t mean they still don’t make mess. I still carry some around in my handbag, and have them stashed around the house for quick clean ups. But, did you know you should also have some in with your crafty tools – not only for cleaning up those inky fingers, but for stamping with?

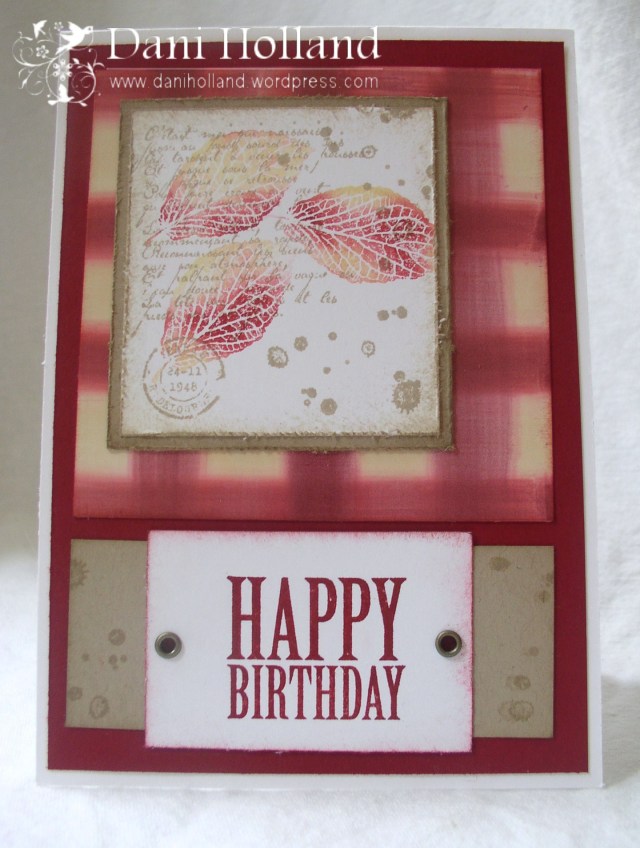
Here’s a card that we made at last Tuesday’s Technique Class; it uses two baby wipe techniques – Baby Wipe Background, and Baby Wipe Ink Pad (or that’s what I call them – do a search on Google, and you may come up with some slightly different names, but they’re the same technique!)

  • Stamp Set: French Foliage, Afterthoughts (Level 1 Hostess Set)
  • Ink: Crumb Cake, Cherry Cobbler and Re-inkers in Cherry Cobbler and So Saffron
  • CS: Whisper White, Cherry Cobbler, Crumb Cake, Glossy White
  • Accessories: Cropodile, Metallic Eyelets, Baby Wipes

The tartan background was inspired by this Gina K. card – I already knew how to do a striped background, but it had never occurred to me to turn the cardstock around and swipe away again! Thanks for the inspiration Gina!

I was trying to create a more ‘masculine’ look for this one – it’s always handy to have a few cards stashed away so you can look organised for people’s birthdays (my problem is not the card making – it’s getting them to the post office on time!) I think French Foliage may be one of those rare stamp sets that you’ll be able to use for both masculine and feminine cards, so if you love the look of it as much as I do, don’t miss out – it’s only available until 31st July (unless it makes it into the 2011-2012 Idea Book and Catalogue, and I can’t guarantee that).

If you’d like to learn how to make this card, I’ll be running this class again on Wednesday 15 June – just email or call to make your booking!

Thanks for taking a peek today.

Cheers,

Time for a Morning Cuppa!

I was feeling a bit lost this morning. I dropped Bella off for her very first day of ‘pretty school’ (preschool), then dropped Claire off at primary school, and then wandered off aimlessly with absolutely no idea what to do with myself. It’s the first time in years that I’ve been responsible for no-one but myself all day, and it feels very odd. I was saved by a visit to Gloria Jeans for a cappuccino and a caramel mini cheesecake (which I didn’t have to share with anyone) and browsing (uninterrupted) through a few card making and scrapbooking magazines – things are looking a bit brighter now. Amazing the healing properties a few quiet moments and a good cuppa can bring.

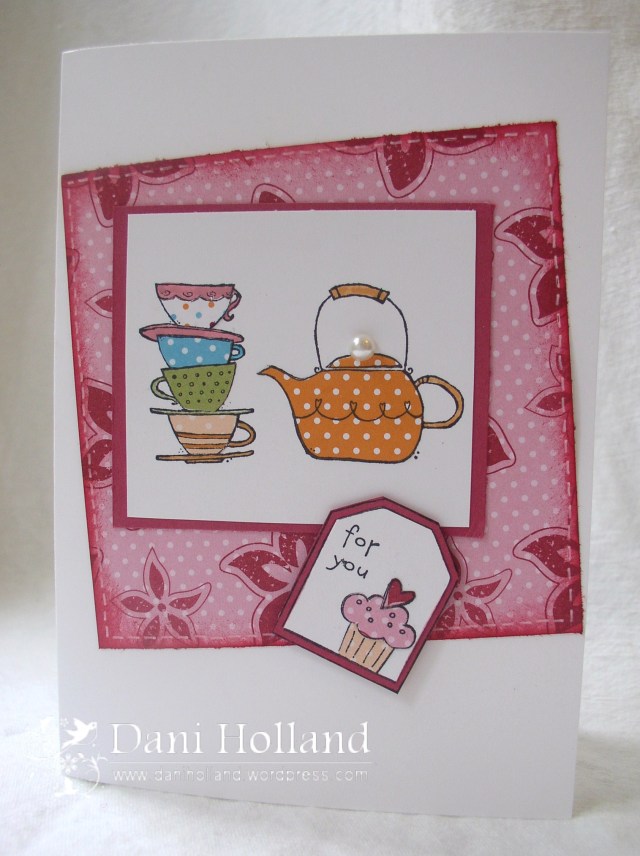
Speaking of cuppas, the reason I popped in to post was to share the cute card we made at our Paper Piecing Technique Class on Wednesday. Paper piecing can be a bit fiddly, but it’s so much fun – just like playing paper dolls for grown ups!

  • Stamp Sets: Morning Cup, Birthday Bakery (Level 1 Hostess Set)
  • Ink: StazOn Black, Rose Red, Stampin’ Write Markers in Pear Pizzazz, Peach Parfait, Regal Rose and Tempting Turquoise
  • CS: Whisper White
  • DSP: Island Oasis (no longer available)
  • Accessories: Basic Pearl, White Gel Pen

I like creating cards that tell a little story. Here’s the table set for tea (and don’t forget the cake), with a white linen napkin, and pink floral tablecloth. This would be a nice card for someone who has a ‘thing’ for pretty teacups (someone like me!) or maybe you could even use it as an invitation to a tea party.

Paper piecing is a fabulous technique for using up those tiny little scraps of DSP you have that are too small to use, but too beautiful to throw away. I hope I’ve inspired you to go get out your paper snips! Have fun.

Thanks for taking a peek today.

Cheers,

Just a little bit of pink…

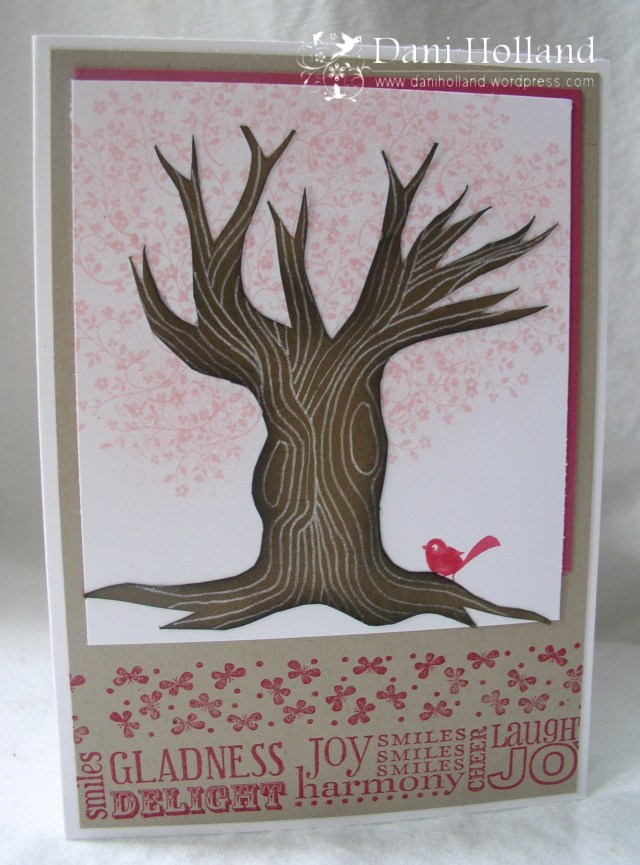
I recently found out that not only will I be an Auntie again, but that there will be another little girl in the Holland clan! Because the last baby was a boy, who is now a big, gloriously rambunctious almost 3 year old, who delights into getting into scrapes and tumbles (God love him :)), I couldn’t help sending something a little bit pink in the mail for the teeny tiny princess-to-be, and a card for her Mummy and Daddy…

  • Stamp Sets: Aviary, Delight in Gladness and Butterfly Bliss Builder Wheels, Tiny Tags
  • Inks: Rose Red, Soft Suede, Blushing Bride
  • CS: Whisper White, Soft Suede, Rose Red, Crumb Cake
  • Accessories: White Gel Pen

To create the tree trunk, I drew the tree trunk freehand on the cardstock, and then cut it out with my paper snips. Then it was just a matter of ‘doodling’ the bark lines on with my White Gel Pen – I find it easier to draw the ‘knot holes’ first, and then just layer the lines around them. Sponging the edges of the cardstock in Soft Suede creates a shadowing effect to make the tree trunk look more rounded.

I then put the tree trunk on my Whisper White cardstock, and drew a very light pencil mark around the branches. Then I could use the  little blossom stamp from the Tiny Tags set to stamp around the branches to form my tree ‘leaves’. Try and keep the ‘stalk’ end of the stamp close to the branch, so it gives the tree a rounded appearance.

Finally, I stamped the tiniest bird from the Aviary set (I love that bird – it’s my favourite!) I was actually going to stamp the little bird in the tree branches, but the stamp fell off my clear block at a crucial moment – d’oh – that’ll teach me to keep my clear blocks nice and clean! Since that’s where she wanted to be, I let her stay, and coloured the not quite perfect bit in with some Rose Red ink and my Blender Pen . 🙂

I think the new Delight in Gladness Builder Wheel will be just perfect for baby scrapbooking and cards, especially teamed with Butterfly Bliss. They look so cute together, don’t you think?

September seems like such a long time away!

Thanks for taking a peek today!

Cheers,