Hi everyone! I’d like to share something a bit different with you today. I’m not known for my skills as a scrapbooker (although I love looking at others beautiful work), but I’m having a lot of fun playing around with the scrapbooking features included in Stampin’ Up!’s My Digital Software (MDS). Hmm, maybe I might need to change my tune!
I have had some experience using digital imaging software previously, like Photoshop, Photoshop Elements, and gimp (a free software available for download). I have found MDS to be very user friendly, and have had lots of fun learning by basically jumping in and trying it out by changing the look of my blog, making cards, and now for a team swap, a digital scrapbook page!
- Program – My Digital Studio
- This and That Epic Day Digital Kit – Digital Download 133465 $14.39
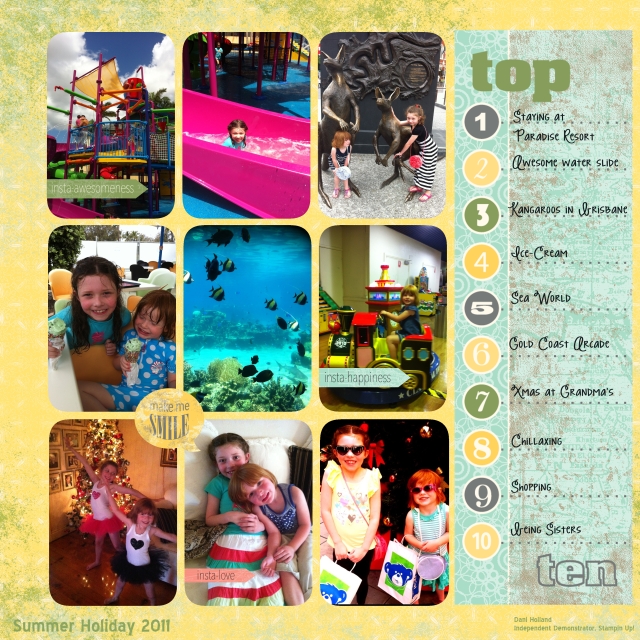
All these photos were taken on a Summer Holiday in Queensland. Because they were all taken with my phone, they’re not the best quality to enlarge, but some of them are so cute, I had to find some way to display them! The beauty of doing this in a digital page, is that I have used an existing photo layout perfect for this size photo.
All I had to do, was choose the background paper, drop in the photos, add a few embellishments (think of them as digital stickers), and add my text. The This and That digital kit offers grunge, vintage and eclectic styles all in one – all the things I like! You’ll notice my blog header and side buttons were also made using this kit. It includes 22-piece SVG stamp brush set, 12 Designer Series Papers, 101 embellishments – basically all the This and That traditional products in digital form. And the colour palette is gorgeous – Basic Gray, Calypso Coral, Crumb Cake, Daffodil Delight, Gumball Green, Island Indigo, and Pool Party.
I’m thinking of getting this printed and put in some white box frames for the grandmas – so many cute photos of my girls in one place!
If you’d like some more info on MDS, please don’t hesitate to email me, I’d love to have a chat.
Thanks for stopping by!


